

Hack: Cross platform OAuth 2.0 with Delphi
Develop a solution that works cross platform using OAuth 2.0 for accessing restricted APIs in your Delphi FMX application


Overview
If you have to develop an application, you will notice that OAuth 2.0 is widely used and most often it will bring up your browser front and center to login into some website to grant access to their data, and then redirect the user to specified URL.
You can find the full specs on the Authorization Framework here
This works great for web applications, however it makes for a broken solution when applied to stand along desktop applications as it requires a browser window to pop-up, and then a call back to be received to some web server that runs on the internet or in your localhost. This is where the hack comes in, although I am using it in Delphi it can be applied the same way in other languages and frameworks... However, if you have never used Delphi you might be surprised at how well it performs and easy it is to use for rapid application development. The following diagram show the process we need to follow in order to obtain an Access Token we need to follow a set of steps.
Steps
The way we are going to hack the OAuth 2.0 process so that it can work all within our application by following these steps:
We are going to embed a browser
We are going to call the URL and navigate
The user will login
The user will accept the access request
The redirect will call a URL that will break
On the load complete event we will: (a) stop loading the callback URL; (b) extract the code needed to request the access token; and (c) hide the embedded browser
We will use the extracted code from the callback, and do a POST request in order to receive a valid access token
There you have it, a pretty simple hack allows you to integrate the OAuth 2.0 process into ANY application that can embed a web view/web browser in it.
Application
We are going to now put theory in practice by building a Delphi FMX application that will our proposed procedure. We will be using the TMS Software FNC Web Core component in Delphi, which brings the TTMSFNCWebBrowser component that uses the Edge Chromium on Windows, WKWebView on iOS/macOS, and Chromium on Android. Now that we know the tools we are using, we are going to use the Fitbit Web API that requires use to use OAutho 2.0 for authentication. As usual, we need to bring this down into a series of steps: (a) setting up your fitbit developer account, (b) installing Delphi (you can do this with Lazarus as well), (c) setting up your application, and (d) adding the logic for the OAuth process. I will not cover software or account creation setup, but I will guide you in the right place so you can do so yourself.
Fitbit API
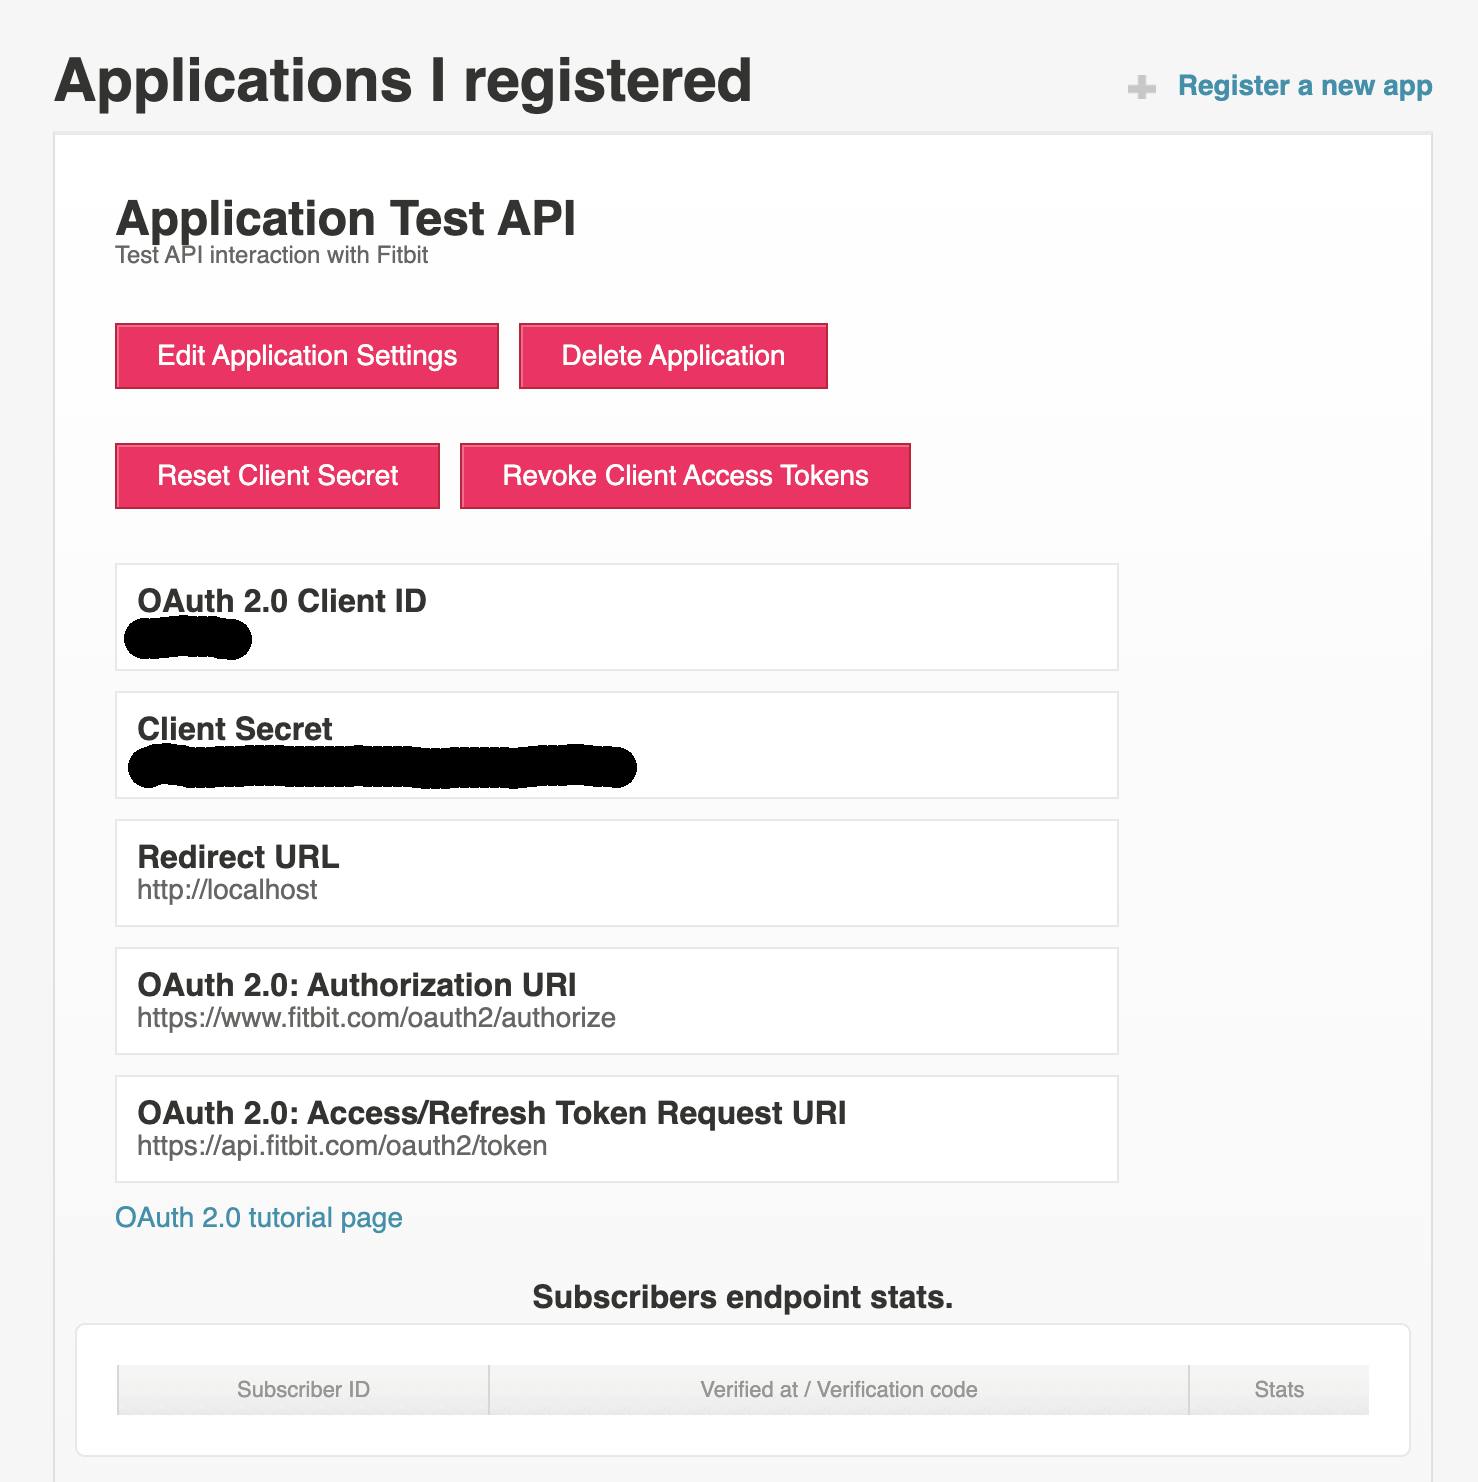
We need to login to the the developer portal over at dev.fitbit.com/login, here you can create your account. After you have an account, you need to register your new application here: dev.fitbit.com/apps/new
Once your application has been created you will get the following:
From there you can click on the Tutorial page link at the bottom and will bring a page to test your new OAuth access to the Fitbit API:
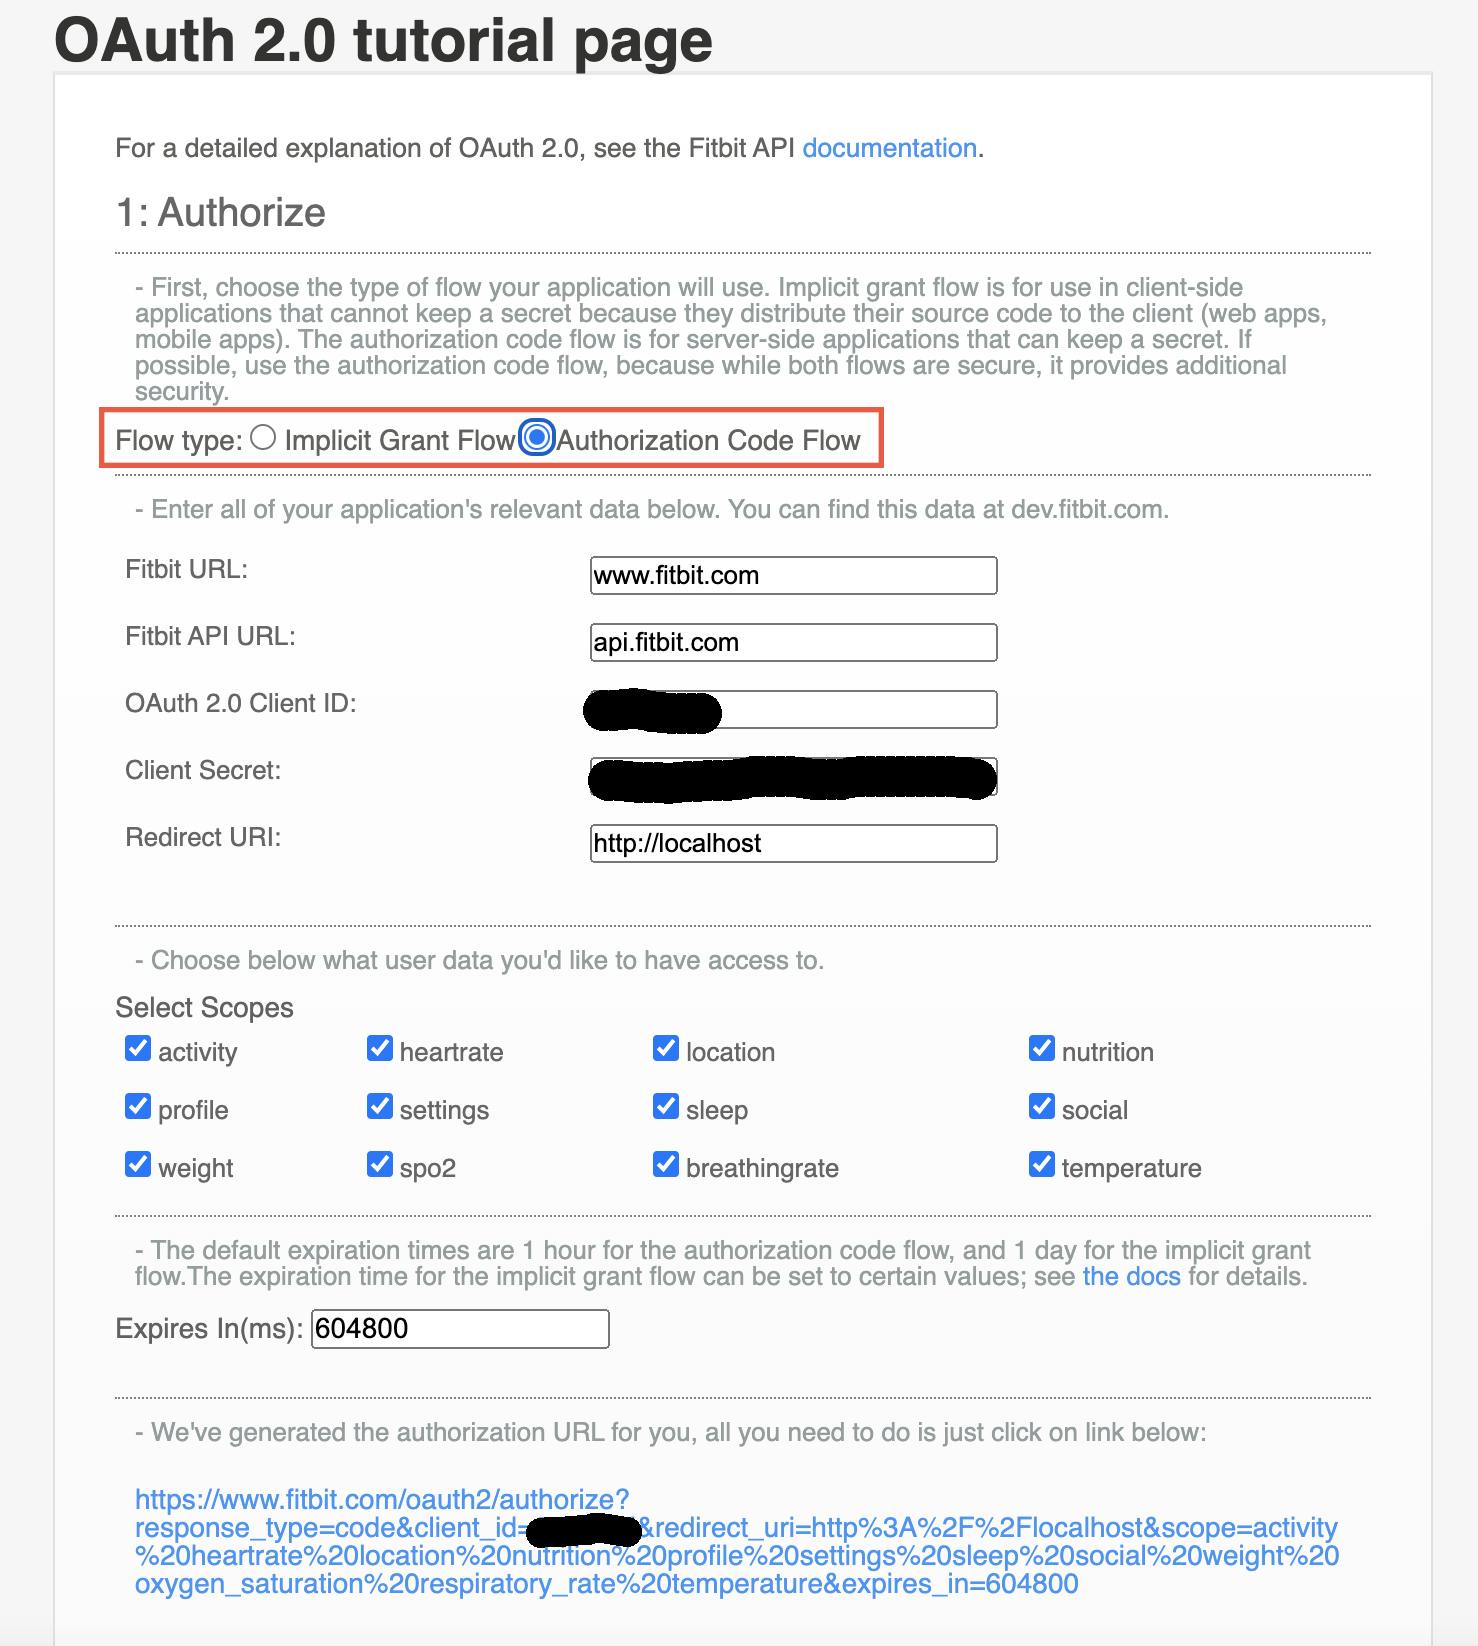
TIP: Make sure you encode the OAuth string properly, otherwise it will not load within your Delphi embbeded browser properly across different platforms
The tutorial page will contain the following URL:
fitbit.com/oauth2/authorize?response_type=t..
NOTE: We will use this link to navigate to within our embedded web view
Installing Delphi
You can download and install Delphi from here: embarcadero.com
NOTE: there are two versions, if you are a solo developer, a student, or learning as a hobby download the community edition. If you are testing Delphi within an organization, download the trial or purchase the software. Delphi has been worth every penny as I have been able to develop numerous internal tools and mobile applications much faster than in other language.
An alternative is to download Lazarus, similar to Delphi but uses the Free Pascal Compiler (FPC) and I use it in the MacOS environment to develop some internals desktop applications. It is good, but not as nice as Delphi.
Creating Delphi FMX Application
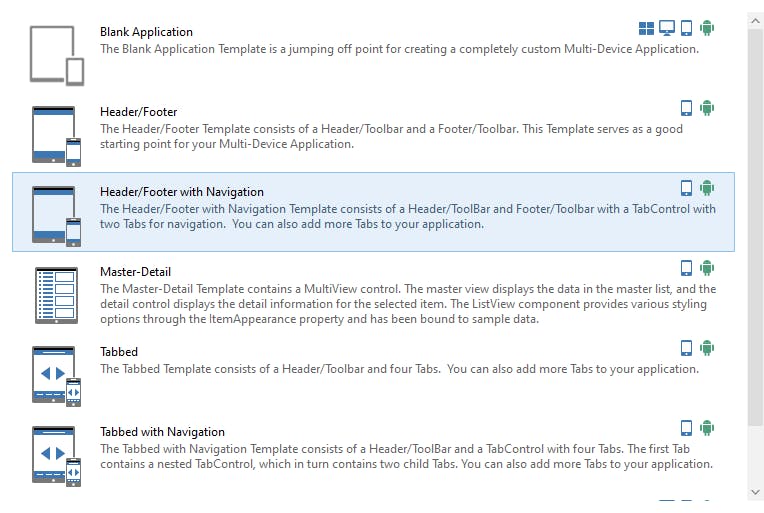
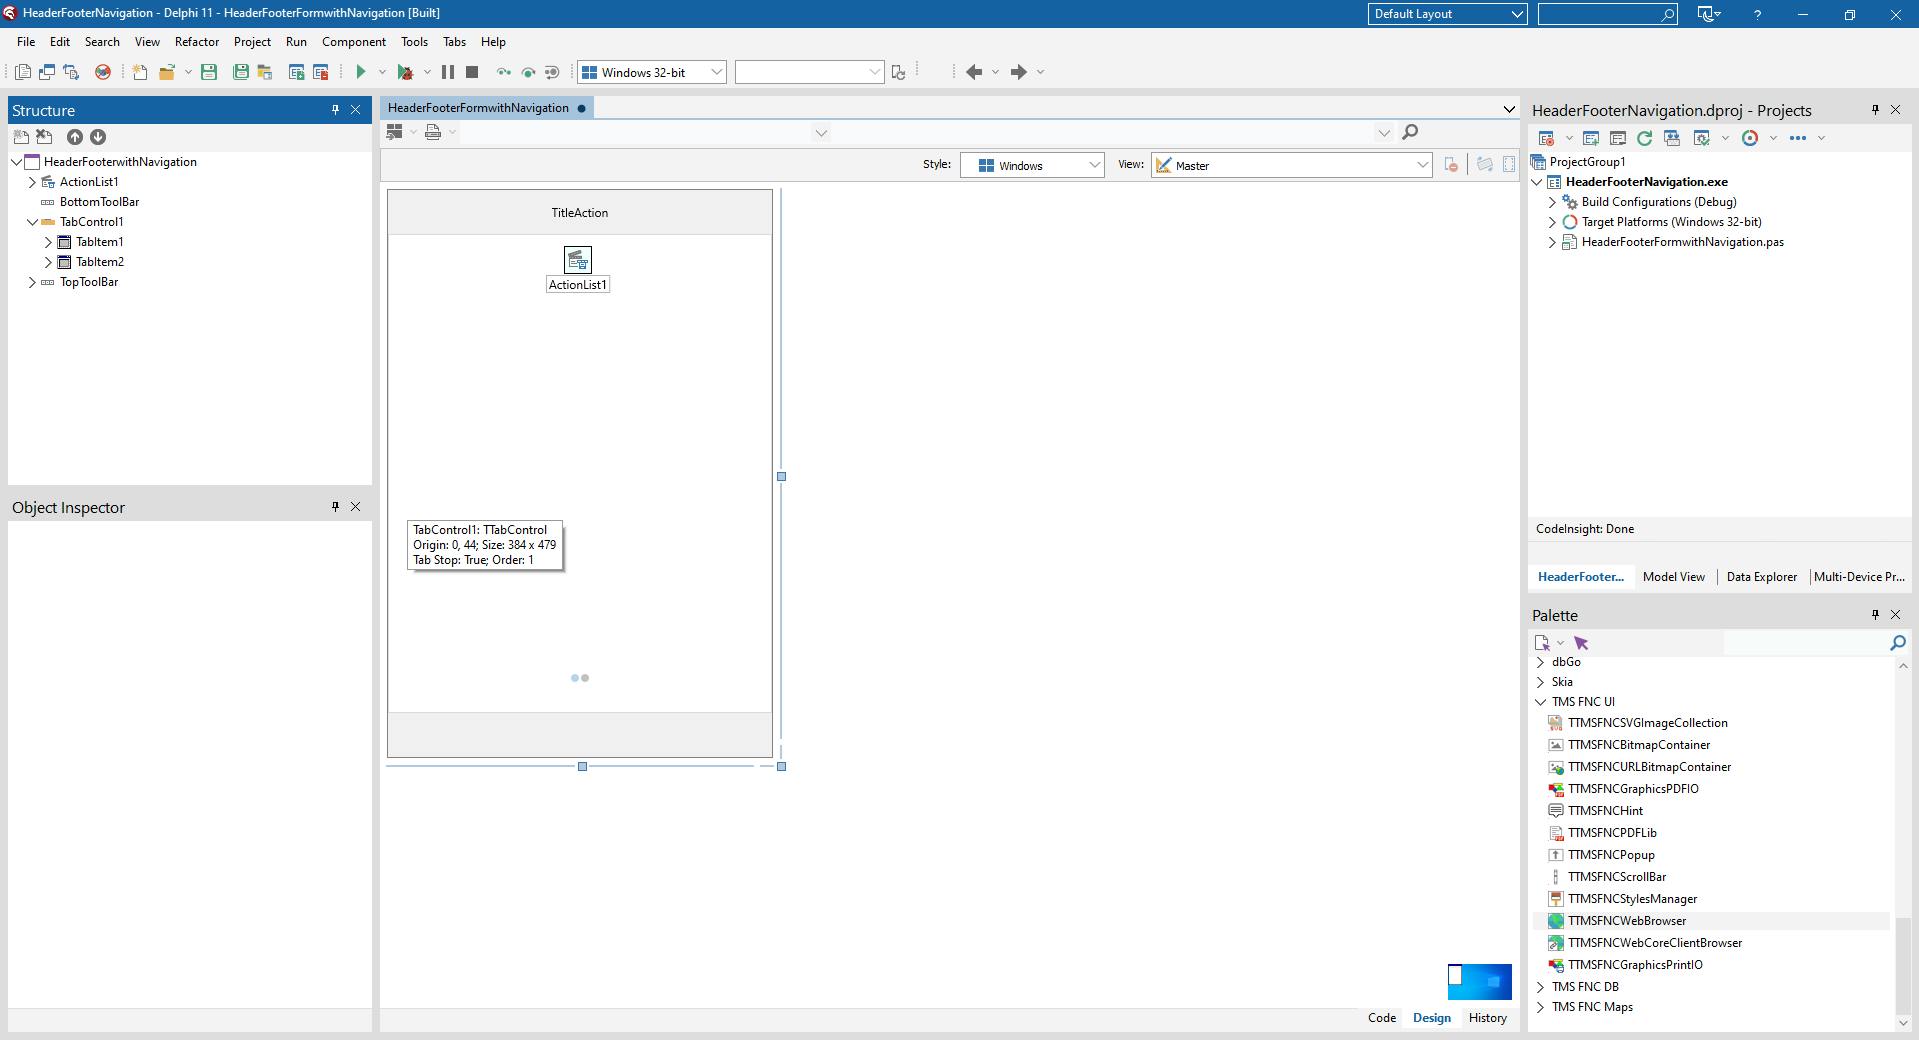
We are going to launch our RAD Studio and create a new Delphi project, we will target the FMX framework that allows for cross platform application. We will select the template that contains a Header/Footer with Navigation as show in Figure 1.
Select a folder for your project, give it a name, in my case I kept the default name. You will end with the following screen:
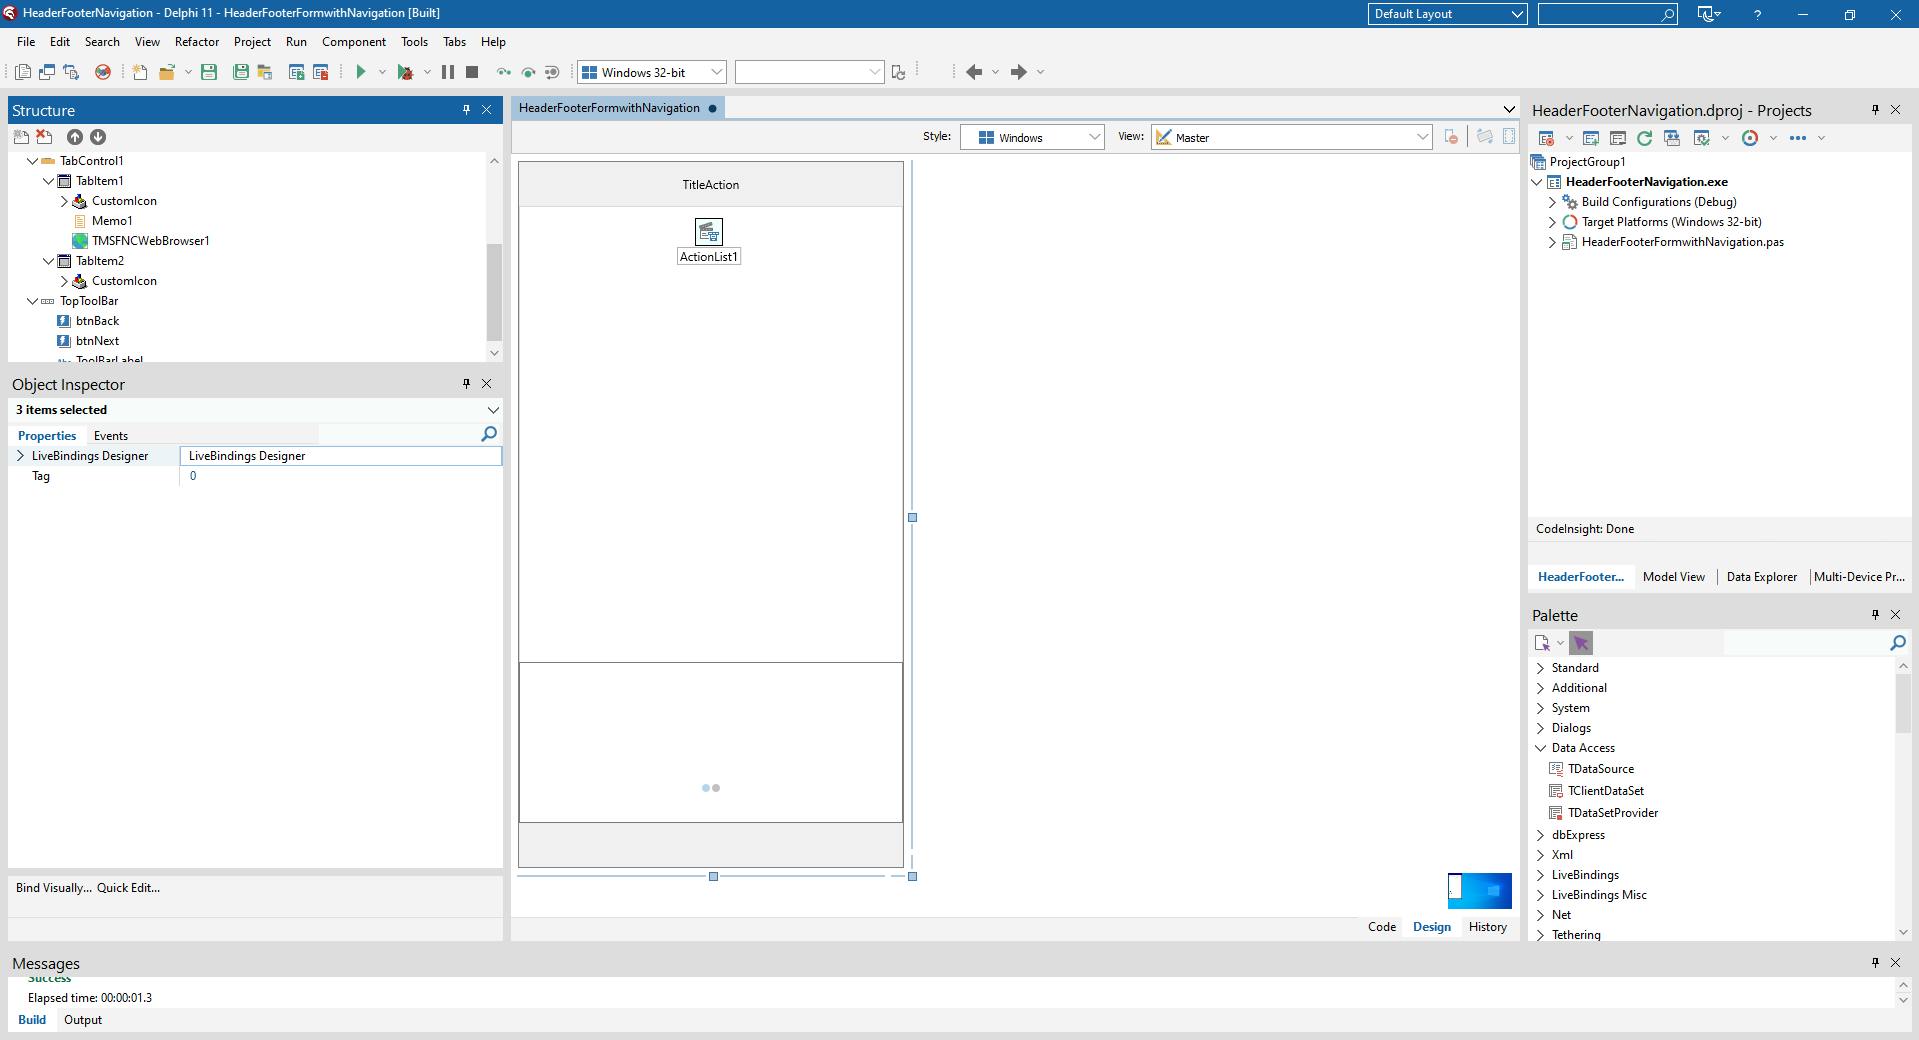
Now we are going to add the TMSFNCWebBrowser to the selected TabItem1 and a TMemo component as shown below:
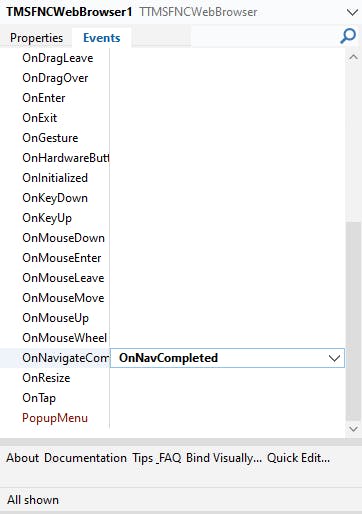
Now we are going to select the TMSFNCWebBrowser1 on the Structure panel, and add a OnNavigateComplete event, under the Events tab of the Object Inspector. We are going to name it OnNavComplete, as shown:
We are going to press Enter and it will bring up the event function, we will add a { TODO } comment and save it. As shown in the code below, we will fill the methods in the next section:
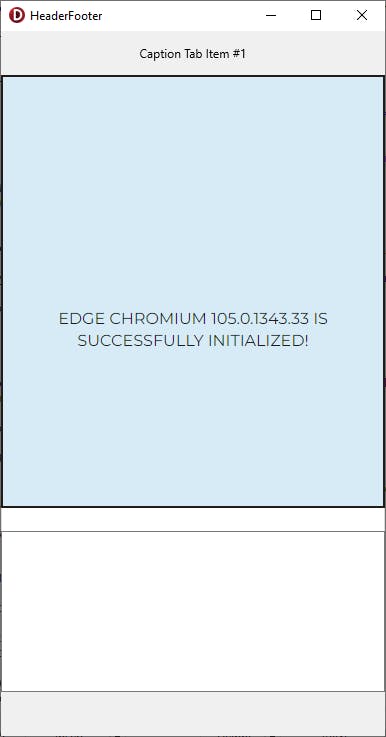
At this point we have a working application and we just need to fill in the logic to login the user and get the Access Token, run the application by pressing the Play button and you should have the following:
Logic for OAuth 2.0 Process
Finally, after a long setup we are ready to get to the meat of the hack in order to get our OAuth 2.0 to seamlessly work in our cross platform application! We are going to fill the code for the OnCreate method so that once the application is launched we will be directed to the Fitbit login screen. We are going to change the create code to be the following:
The new code will navigate to the URL taken from our Fitbit API tutorial page and allow the user to input their login information. Now we are going to switch back to the design view on the application and add a TRESTClient, TRESTRequest, and a TRESTResponse that will add to your project the instances TRESTClient1, TRESTRequest1, and TRESTReponse1. We are going to use those to fill in the POST/GET HTTP calls. A POST call will gives us an access token from the code we received, and then the GET call will give us the users profile. The code below accomplish this when the browser navigates to the localhost/?code specified with the code, we will stop the browser loading the page, extract the code, request the access token, and get the user profile.
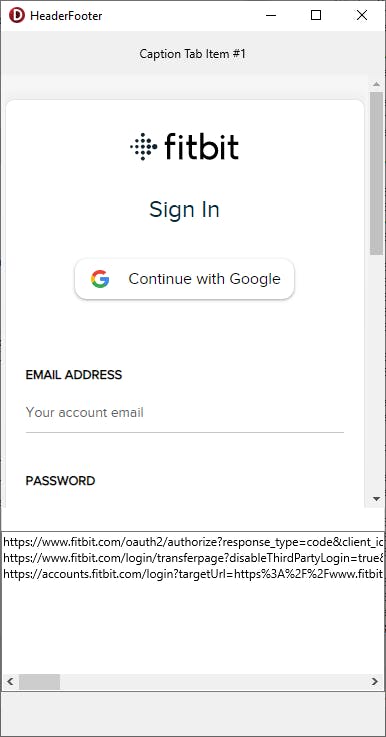
The application screens should ask the user to login:
Then after the login it processes the data and gets the user profile
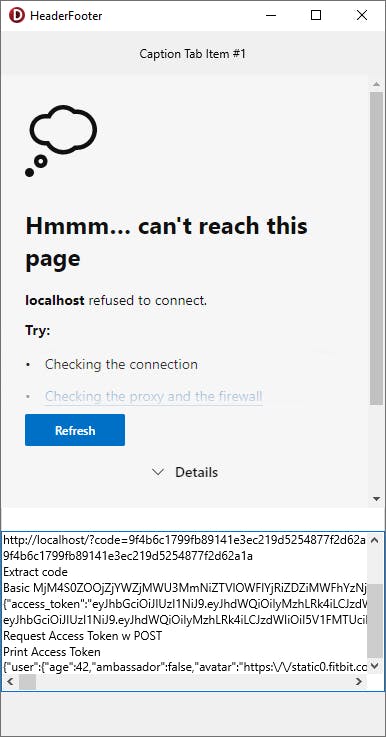
The whole process is completed, and we should store the access token somewhere as well as navigate out of the login screen.
Conclusion
This is a hack, that can be used to deal with some pains when dealing with OAuth. Keep in mind that if the application is in Android, iOS, and UWP your registered application does get a call back to a given URL that triggers a valid function for the user to extract the code. However, it is not universal, you cannot use it in a native Windows/MacOS/Linux application, no one wants or needs to spin a web server for a callback... you can, but just because a hipster web developer thinks that every application should be a web application it does not mean he is right or knowledgeable. The design of OAuth should be changed in 3.0 so that the accept button should return a JSON object with the code from the Authorization server rather than making a callback in my opinion to make it work on every different type of application.
Take a look at the full source code of the sample application here.
Hope this helps someone!