How To: Delphi FMX iOS with Notifications
A Fast Method To Developing an iOS App with Delphi supporting Notifications... Oh my!


In this article, we are going to learn how to develop an iOS mobile application that can be notarized easily by Apple using Delphi's FMX framework. We are going to accomplish this by creating the XCode Project, and then the Delphi FMX Project.
HINT: if you already have a Delphi FMX project that you want to deploy on iOS, just follow the XCode Project section, and make sure you use the credentials from your Delphi FMX Application when creating the XCode App.
XCode Project
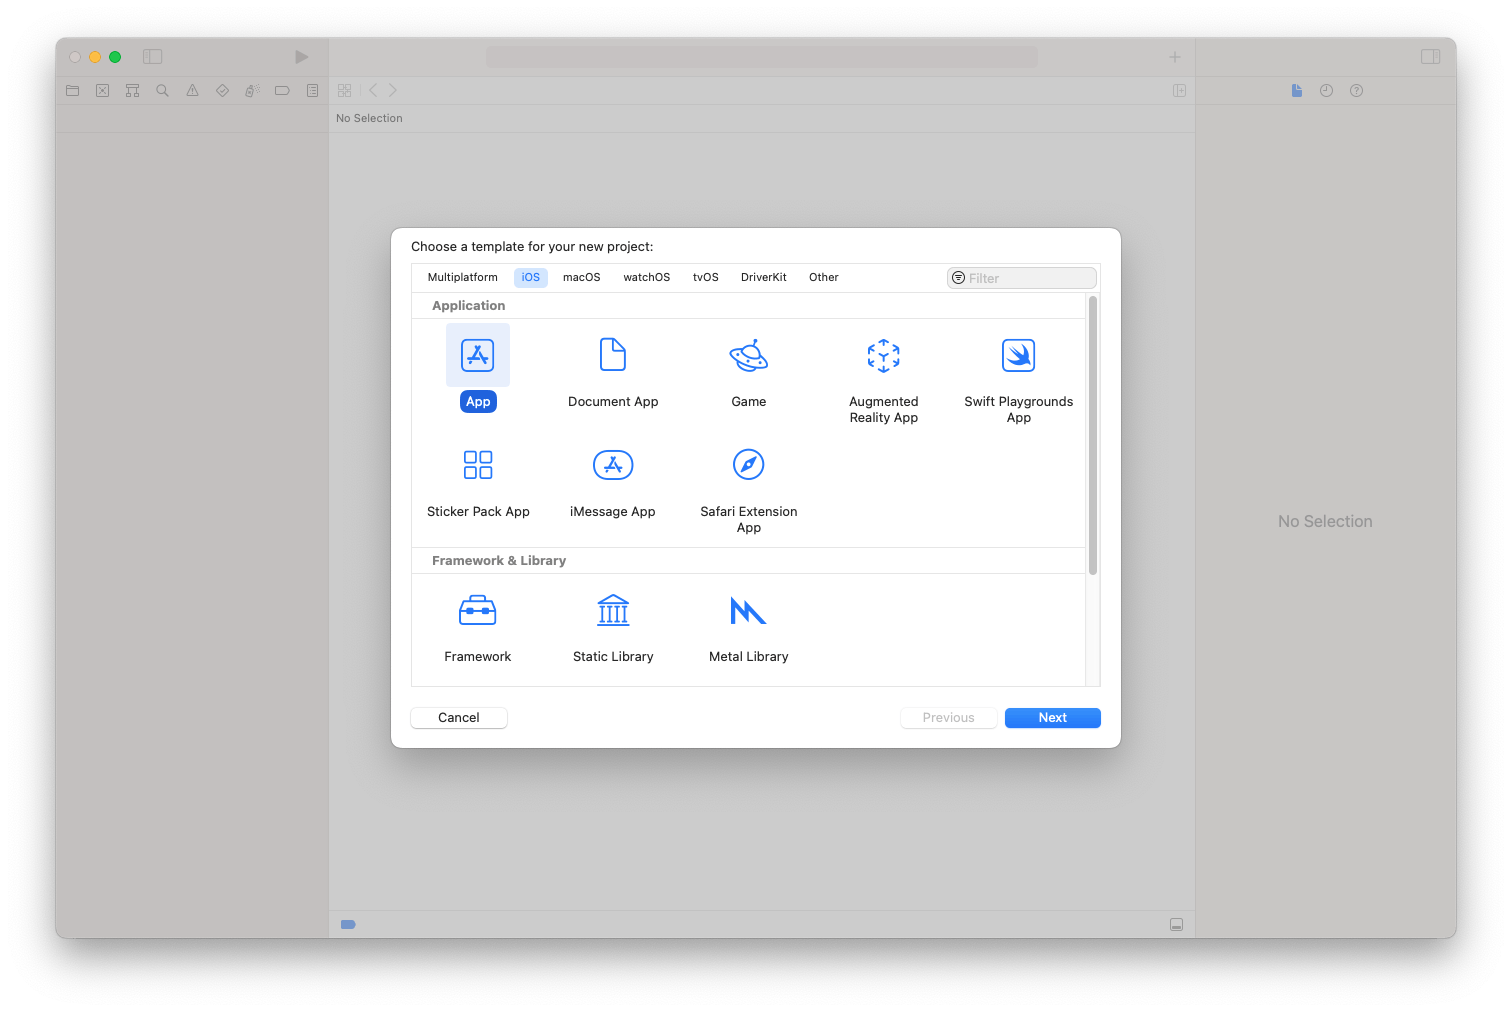
First, we are going to jump into XCode and create our App. We will create a new project, select the iOS target, and finally select App as shown in the figure below.
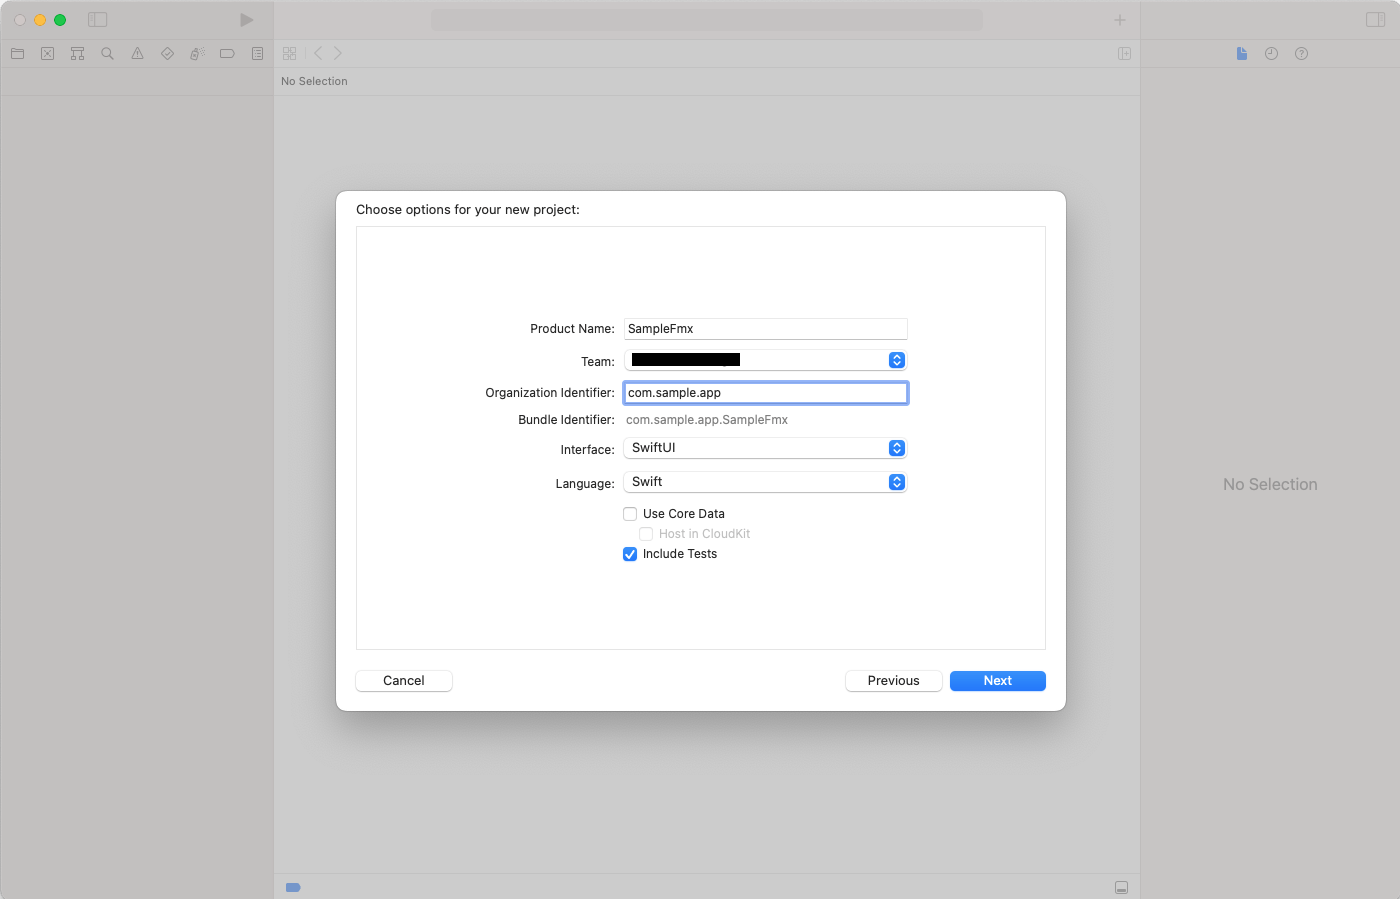
The second step, is for us to set the Product Name as well as the Organization Identifier as shown below, keep in mind we will re-use those when creating our FMX Delphi Application.
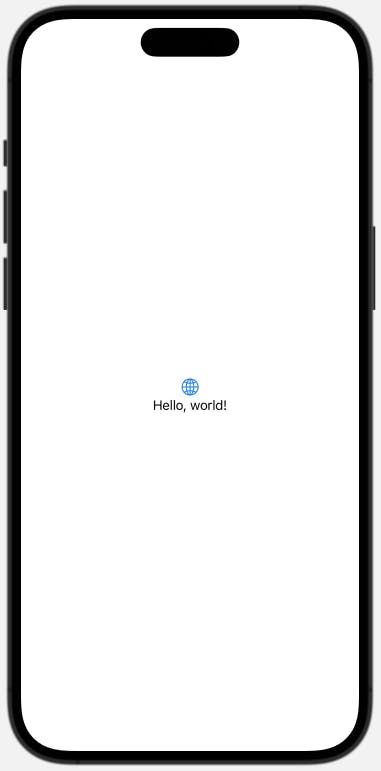
The final step creates the application, we need to double-check the Signing & Capabilities of the project, then run it on your development device and have it display the "Hello World" text on the app to complete this step.

The image below shows the application from the XCode editor, and looks the same on the device.
With the notirized iOS project, we can move forward to our Delphi FMX solution.
Delphi FMX Project
Now that we have a completed and device-tested iOS application, we are going to switch to our Windows machine and fire up our RAD Studio. We are going to create a new Multi-device project by going to Project > Add new Project ... then selecting Delphi > Multi-Device > Blank Application in the RAD Studio as shown in the image below:

We are going to have a new Blank Application screen, as shown in the next image.

We are going to save the project by going to File > Save Project As..., and create a folder for the project named sample-fmx, then create two folders within that project: Project, and Src. In the project folder we will save the project as SampleFmx (SampleFmx.dproj). Finally, we are going to save Form1, the Unit1.pas, as Sample.Form.Main.pas within the Src folder. This will give our Delphi project a good structure.
Verifying The iOS SDK
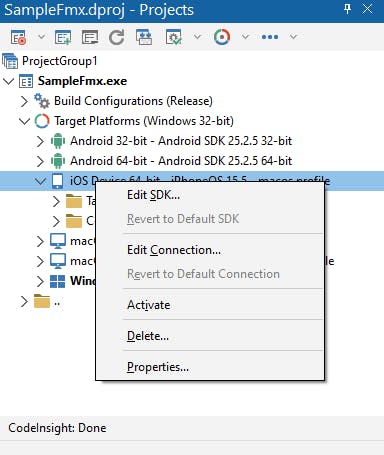
Go to the project window, select the iOS Device 64-bit - iPhoneOS 15.5 - macos profile, then right-click and select the Edit SDK... as in the image below:
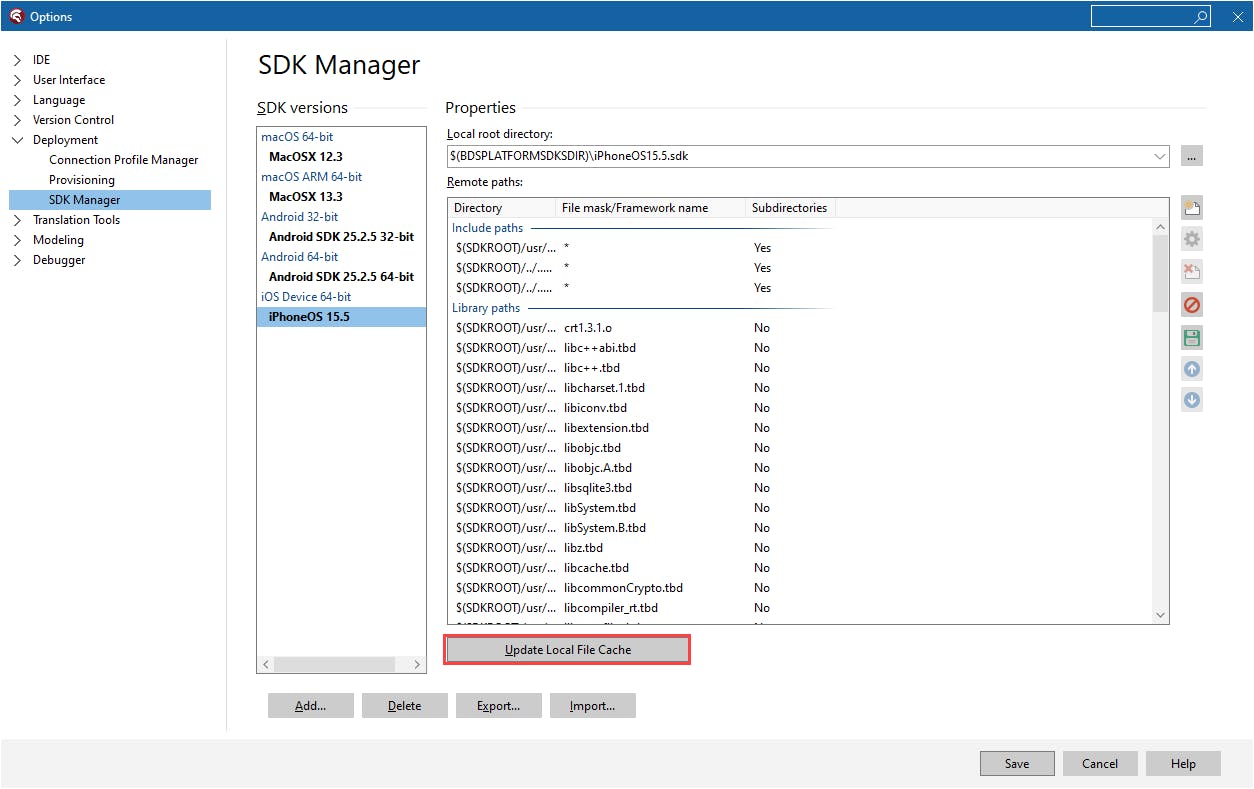
The Options modal window will appear, and you will need to select the iPhoneOS 15.5 and click on the button Update Local File Cache. This is if you have had an older version of the iOS SDK that has been updated for newer versions. Here we show an image of the modal window and the button to click.
Notifications
Next, we are going to add a TNotificationCenter component to the form. You can search the palette and find it as I show in the next image:

Now we are going to resize the form a bit, and then add a TRectangle with a SpeedButton in it, and a TSkLabel in the button. I use the Skia library for Delphi heavily, if you have not used it yet I recommend you download it and use it as it has many benefits. You can find Skia4Delphi here https://skia4delphi.org/.
The completed UI should look as the following image:

Now we have our UI completed, we are going to change our project configuration to support using the TNotifications, otherwise your app will CRASH. Navigate to Project > Options... and select the Version Info under the Application. Select the Target to be the All configuration - iOS Device 64-bit platform (the sample image uses the Debug target) and scroll down the Key/Value list and right-click to Add Key... to add a new key named FMLocalNotificationPermission and give it a value of true. The following image should show the result of it:

TIP: Refer to the Embarcadero article on using notifications https://docwiki.embarcadero.com/RADStudio/Sydney/en/Mobile_Tutorial:Using_Notifications(iOS_and_Android)
Request Permissions
We are going to select the Form, from the design view, click on the Events tab of the Object Inspector, and double-click on the OnCreate event. This will take you to the TFrmMain.FormCreate procedure where we will add a compiler directive to add code when targetting the iOS platform that will prompt the user for permission to use the platform notification system (I have also added it for the Android devices).
procedure TFrmMain.FormCreate(Sender: TObject);
begin
  {$IFDEF IOS}
    NotificationCenter1.RequestPermission;
  {$ENDIF}
  {$IFDEF ANDROID}
    NotificationCenter1.RequestPermission;
  {$ENDIF}
end;
Similarly, we are going to double-click on the OnClick event of the SpeedButton and add the following code:
  procedure TFrmMain.SbCreateNotificationClick(Sender: TObject);
begin

  if NotificationCenter1.AuthorizationStatus = TAuthorizationStatus.Authorized then
  begin
    var vNotification:= NotificationCenter1.CreateNotification;
    try
      vNotification.Name:= 'TEST';
      vNotification.AlertBody:= 'This is a test notification';
      vNotification.Title:= 'Test Title';
      vNotification.EnableSound:= true;
      NotificationCenter1.PresentNotification(vNotification);
    finally
      vNotification.DisposeOf;
    end;
  end;

end;
TIP: The Name of the notification needs to be UNIQUE, that way it can be referenced and the notification can be updated later on. It is CRITICAL to remember this, especially if creating multiple notifications in a loop.
This last screenshot will show the application running in Windows and also shows the notification on the bottom-right corner of the screen.

TIP: Make sure you modify the icons for each platform you target on the applications, these include application icons, launcher, and notification.
Keychain Issues
Sometimes you might have two of the same certificates in your Keychain, and you will get an error in the realm of "[PAClient Error] Error: E0264 Apple Development: John Doe (5Y9Q25G2TS): ambiguous (matches "Apple Development: John Doe (5Y9Q25G2TS)" and "Apple Development: John Doe (5Y9Q25G2TS)" in /Users/grant/Library/Keychains/login.keychain-db)". When this happens we need to clean up our local Keychain Access, and we do this by running the application in the Launchpad > Keychain Access bringing up the following window:

NOTE: This is my Keychain Access, where I deleted the duplicates. You want to make sure you select the oldest duplicated certificate, then right lick, and finally selected delete.
Apple Store / Ad-hoc signature
This is an excellent source for creating those certificates and software profiles to sign your builds for release. Follow each step and you will have a TestFlight / Store App ready release.
https://www.bluelabellabs.com/blog/generate-apple-certificates-provisioning-profiles/
Conclusion
With this tutorial, we have created an iOS application that supports the notification system in Delphi that is notarized fairly quickly. Using XCode the create the certificates, and then using Delphi with the same identifier to skip over the manual creation of certificates. Not only that, but we integrated the TNotificationCenter into the application and requested permission from the user. The full source code for the working Delphi application can be downloaded from this repo https://github.com/an01f01/delphi-fmx-ios/tree/v0.1.0
References
Expert Delphi: Robust and fast cross-platform application development
https://www.bluelabellabs.com/blog/generate-apple-certificates-provisioning-profiles/