How to: Implement an access token authentication with Tornado and PyJWT
Extending the Tornado and Queries project


In this article we are going to extend our Books project developed with Tornado and the Queries library. We will add token based authentication to our REST API. From this article we will add the following features:
Add a Login Handler
Add a Logout Handler
Add access token validation to the Book and Books Handlers
Note that this article is based on the Flask implementation from RealPython that you can find in this link.
Setup
The first step is to update our requirements.txt by adding the following libraries:
pyjwt
We will then update by calling:
pip3 install -r requirements.txt
Next, since we will be using the PyJwt library for creating our authentication tokens, the way we use the library is to as follows to encode and decode with the HS256 algorithm:
key = "my secret key",
encoded = jwt.encode({"some": "payload"}, key, algorithm="HS256")
decoded = jwt.decode(encoded, key, algorithms="HS256")
We need to use a SECRET KEY to use the encoding and decoding feature of the library for our authentication tokens as previously show, for this we will create the key and the store in as an environment variable much like how we did on the past article with the database connection string. We will generate the secret key as follows:
python3
import os
os.urandom(24)
Your console python should look as the screen shot below:

Then we will store the SECRET KEY in your environment variables, and we will name it as follows:
export BOOKS_SECRET="\xadM\x08\x06a\x84h\xc3\x06M\xb9\x90/g>\xcb\xeac\x9a\x0c\x1c\xa9;5"
and if you are in windows, add the variable in the environment variables for your account, just like we have previously covered. The most important thing is NOT to encode the SECRET KEY in your code and have it come from an environment variable.
Next we will modify the database, we will add the users and the blacklist_tokens tables to the booksdb with the following SQL query that we will execute in the Query Tool from pgAdmin to create the necessary tables.
At this point you should have the database setup accordingly. In my case, the users and passwords will be auto generated from a script, since it is needed for an anonymous participant study. For this I will be using the following script to insert participant data onto the database and save them to a CSV file:
Run the script as follows:
python3 create_db_users.py
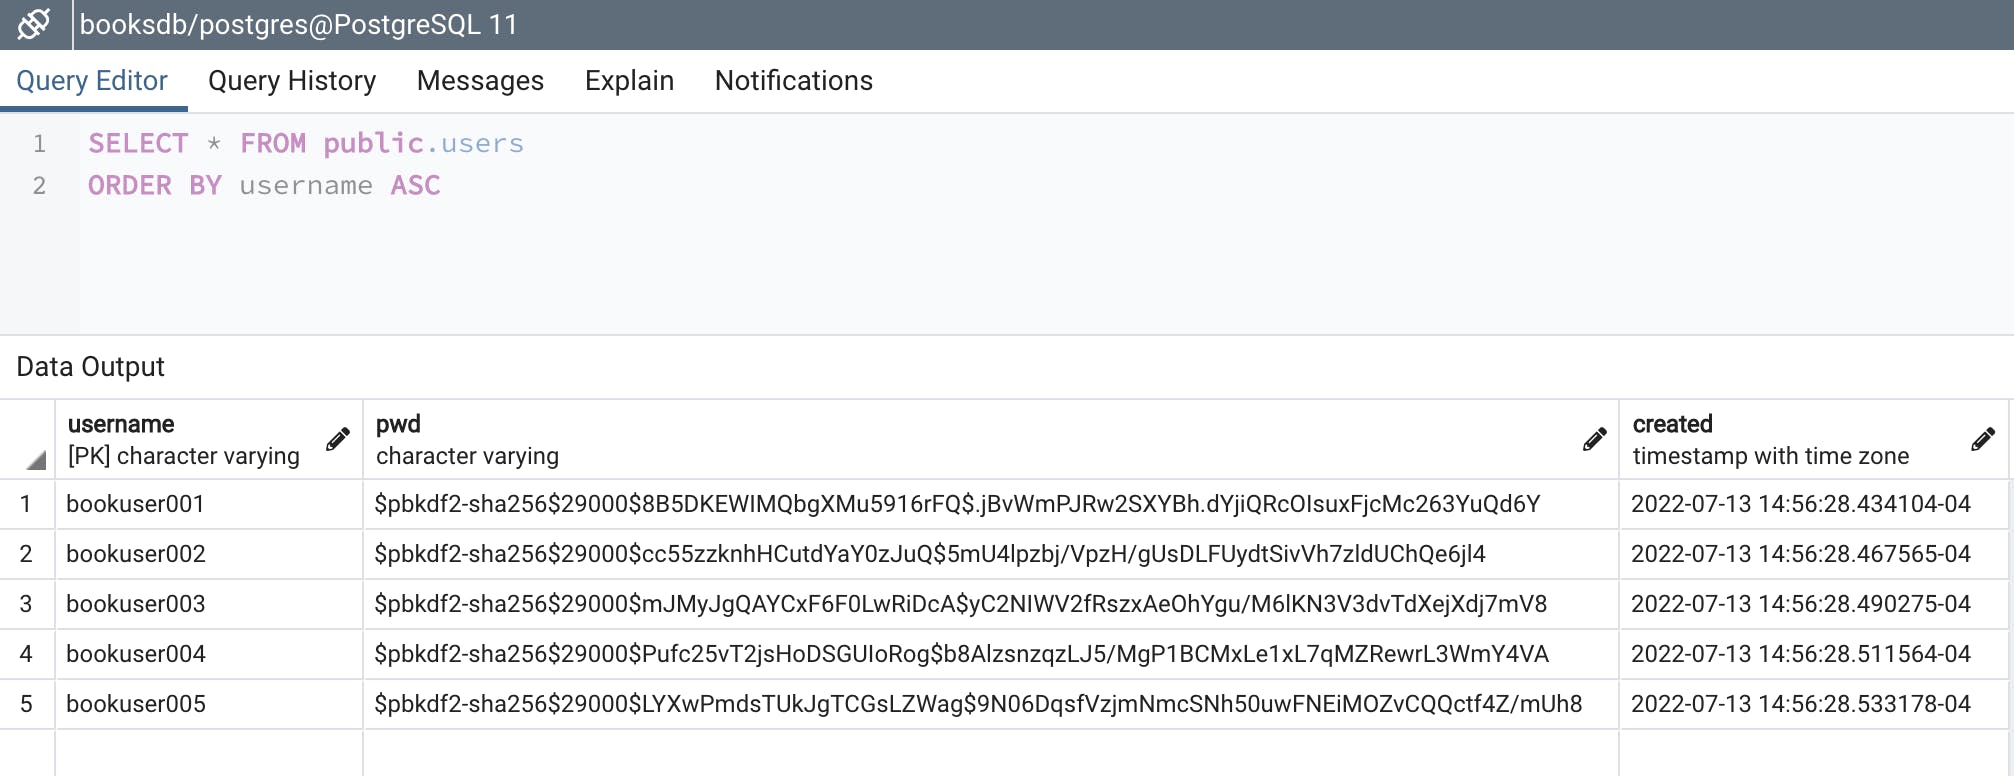
The database will be populated as show below with encrypted passwords:
A CSV file named booksdb_users.csv will be created containing all the users and their non-encrypted passwords.
NOTE: Make sure NOT to leave the file in the server if you run the script there.
Access Token Implementation
Now that the setup is done, we can dig into creating the new handlers and updating the book handlers to require a valid access token. For reference on the encoding and decoding process for PyJwt you should look at this documentation.
We are going to add the following imports and then functions to our app.py file that will allow us to quickly encode and decode our payload for the access token.
from passlib.hash import pbkdf2_sha256
import jwt
User Login
In this section we are going to add the a UserLoginHandler that will contain a POST method which will receive a username and password. We will then encrypt the password, validate against the existing users, and return an access token if the user exist.
We test our code by sending the login json object containing the username and password and we get the following showing a failed attempt and a successful login along with its respective response:

From this we have the following response object with an access token:
{
  "status": "success",
  "message": "Logged in successfully",
  "auth_token": "eyJ0eXAiOiJKV1QiLCJhbGciOiJIUzI1NiJ9.eyJleHAiOjE2NTc3NDM3ODcsImlhdCI6MTY1Nzc0Mzc4Miwic3ViIjoiYm9va3VzZXIwMDIifQ.he12_W0hy5i9tPkAGGpHAFwt2jJSkhYvbF5Lp_GNVek"
}
We need to store that access token locally somewhere, so that we can use it later on in your application to access the REST API.
User Logout
Now that we are able to login our users, we need to invalidate their access token when they log out through a LogoutHandler using a POST request containing the valid access token and adding it to a blacklisted table (we created that table in the previous section).
Note that currently the access token invalidation is global, but it should be modified so that the access token is also user specific.
Using our custom tool developed in Free Pascal using the Lazarus IDE, we can login the user, take the access token, and then log the user out successfully as shown below:
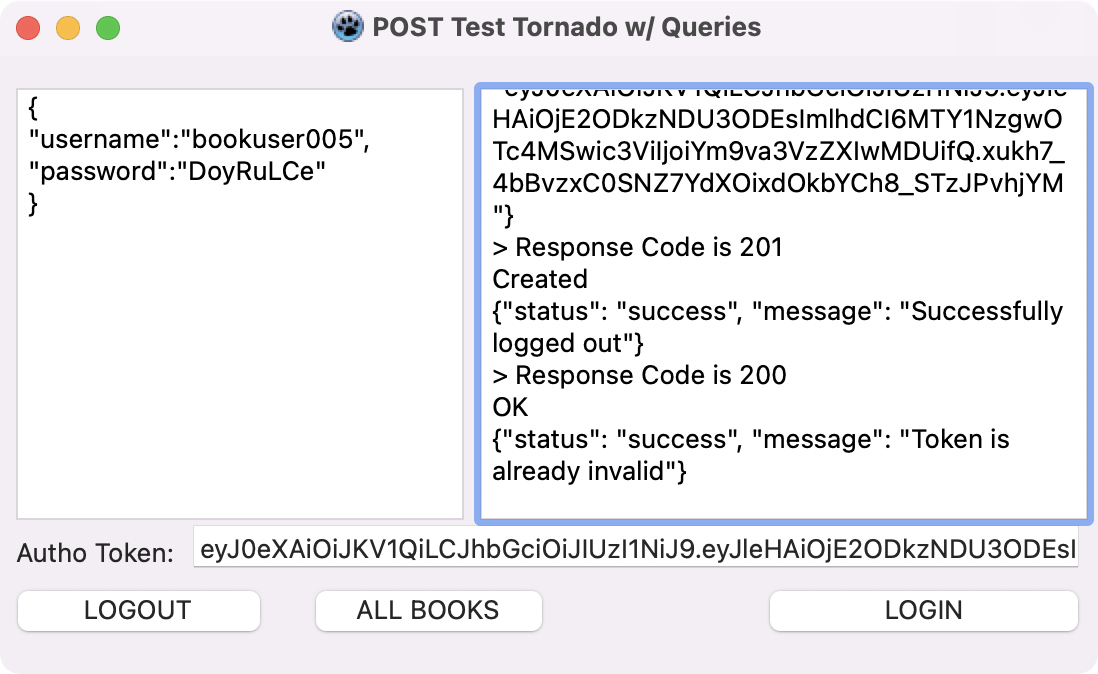
Note that you can do the same with POSTMAN, make sure you Add the header 'Authorization' with a value of 'Bearer ' as we will split the array and extract the access token.
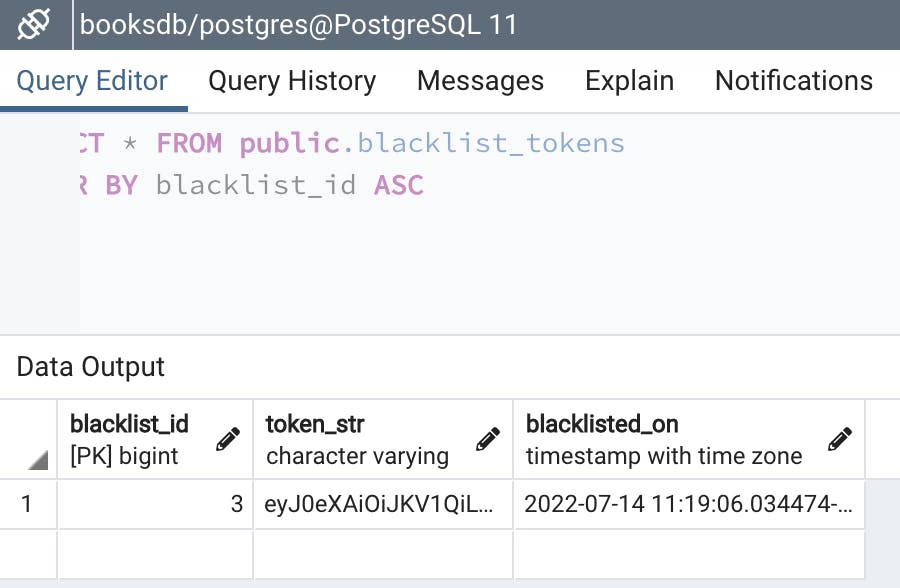
Here we can see the database with the blacklisted token:
REST API Validation
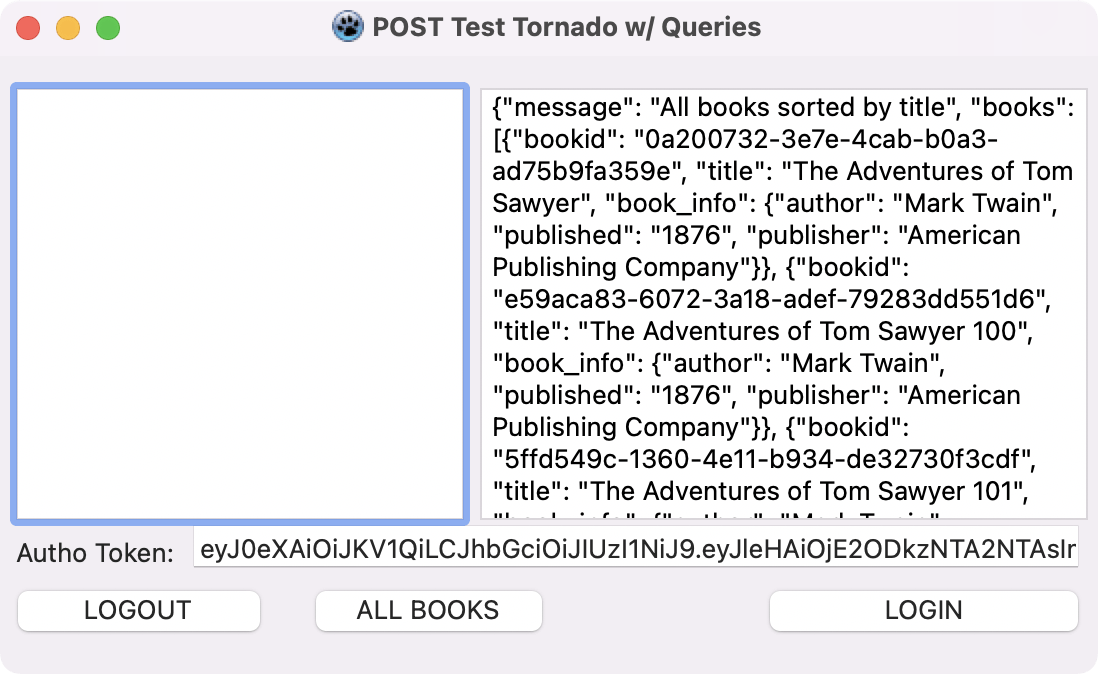
At this point we are going to check on the headers of each request for the GET and POST methods of the BookHandler and BooksHandler in order to secure access to our REST API. We are going to start with the BooksHandler as shown below, similar to the LogoutHandler we are going to check for the headers:
The results of the authorized /api/books GET request:
Finally we update the BookHandler to the following:
As an exercise this can be improved to check the existence of the username in the users database to make sure that not only is the access token valid, but also the user has not been removed.
In a different article we are going to cover code smell, and fix the redundant code for authentication and remove IF/ELSE logic that convolutes this code.
Conclusion
Now that we are done, you can successfully add user login and logout features to your REST APIs in Tornado. You can find all the code for the project in this repository. Ideally you would use a third party library/tool with two factor authentication like Autho0, Firebase, or Microsoft MSAL for authentication handling. However, that is not always the possibility. Some projects will need a custom login features, have a set of users that will not provide any personal information, such as working with anonymous studies that depend on an Institutional Research Board (IRB) or maybe you want to sell access to your REST API in that case this is a great approach.
Improvements
As of a next step you should try to use a variation of this method and integrate an e-mail service, like Mailgun or SendGrid, to send the token to a user on sign-up, password reset, and even for a single link log-on.