Step-by-Step Guide for Creating a Telegram bot with Cloudflare Workers
We are going to be creating a Telegram bot with CloudFlare Workers... FAST!


First we are going to go create a bot in Telegram by using The Bot Father, much how we did it previously. Once you have created your bot make sure you have your TOKEN.
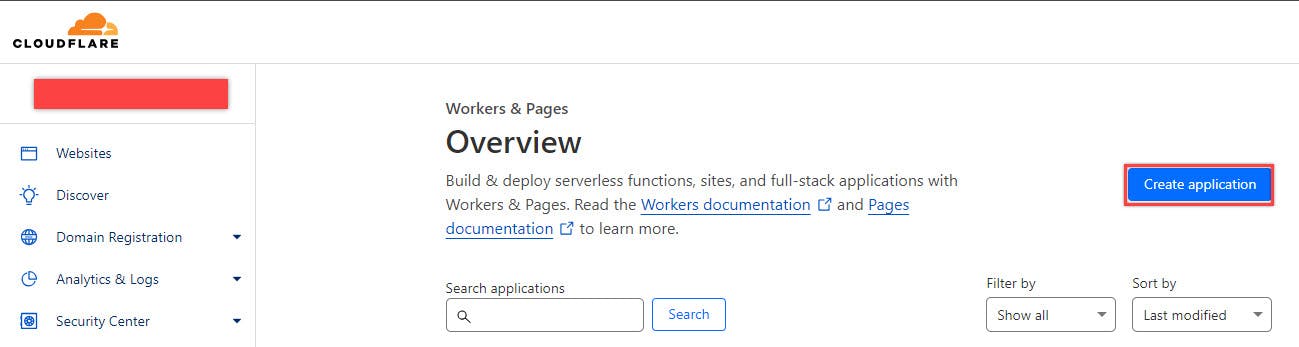
With our new bot created, we now have the Token to use for setting up our backend. What we will do next is go to cloudflare.com and create an account if you don't have one. Once, you have your account we are going to go "Workers & Pages" from our left hand navigation pane. Once we are on the page, we want to click on the "Create application" button highlighted in the image below.
Next, we will create in the button "Create Worker" as shown below.

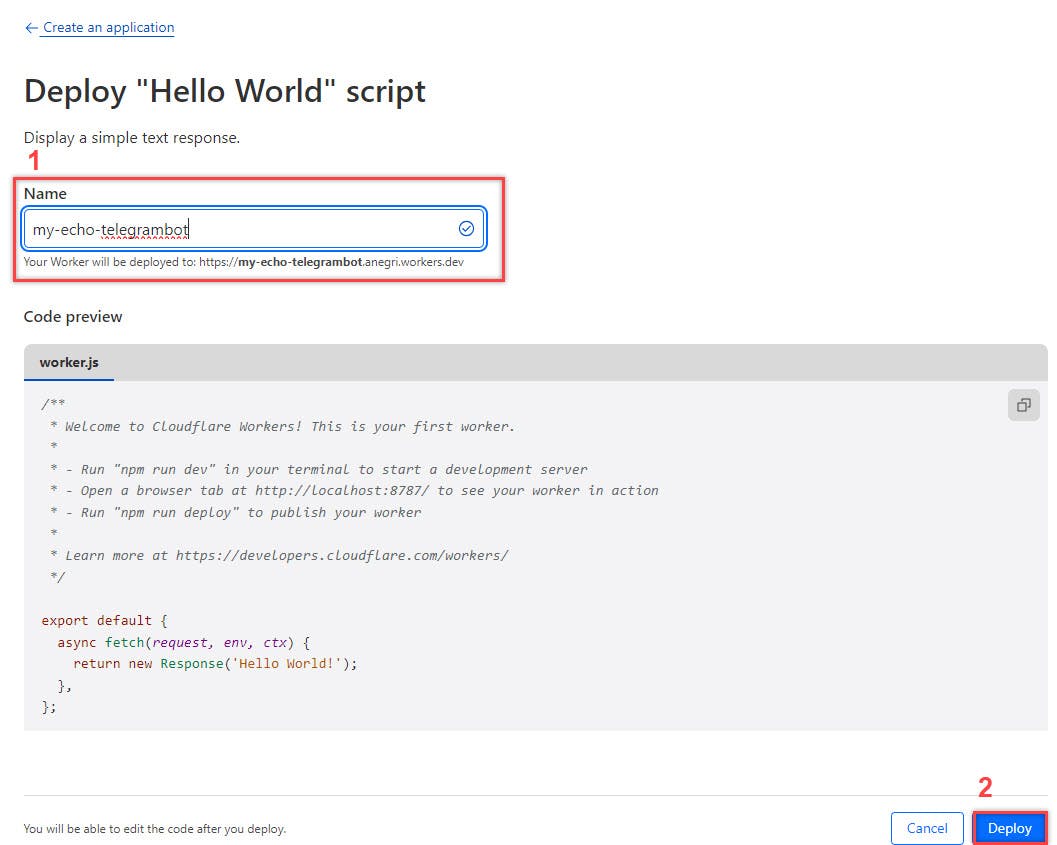
Now a template for creating the worker will be displayed, here we want to do two things:
Enter a "Name" for our new worker
Click on the "Deploy" button for the worker.
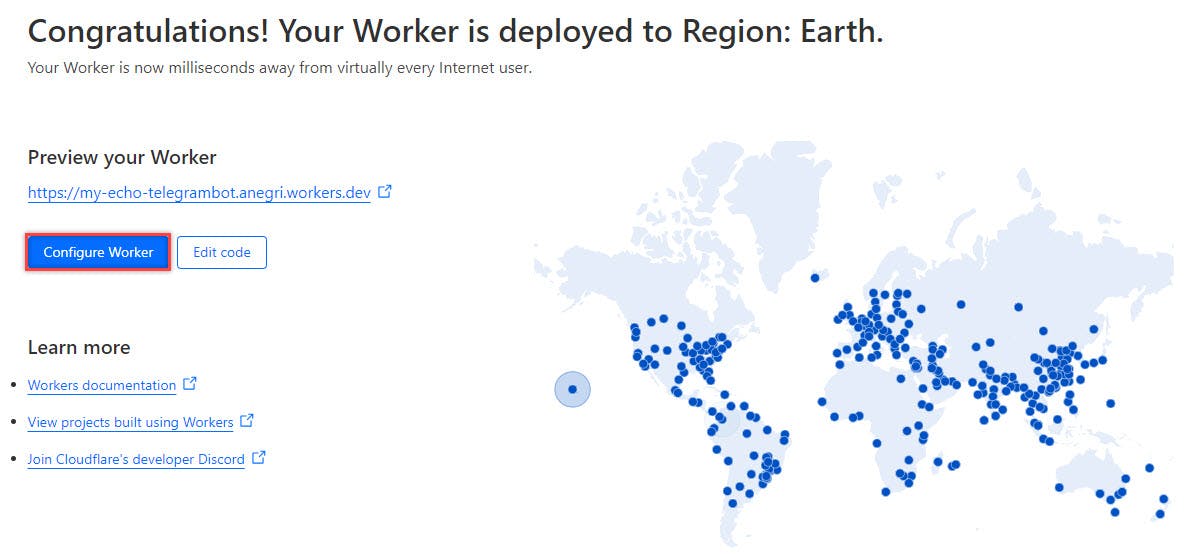
Next we will be show a screen congratulating us on creating our new worker as shown below. However, we are not done yet and we need to click on the "Configure Worker" button.
In our dashboard for our new worker we want to select the Setting tab, and then click on "Add variable".

We are going to add a variable named API_KEY, and we will give the value of our Telegram bot TOKEN (this should be a UUID generated from the Bot Father when we created our new bot).

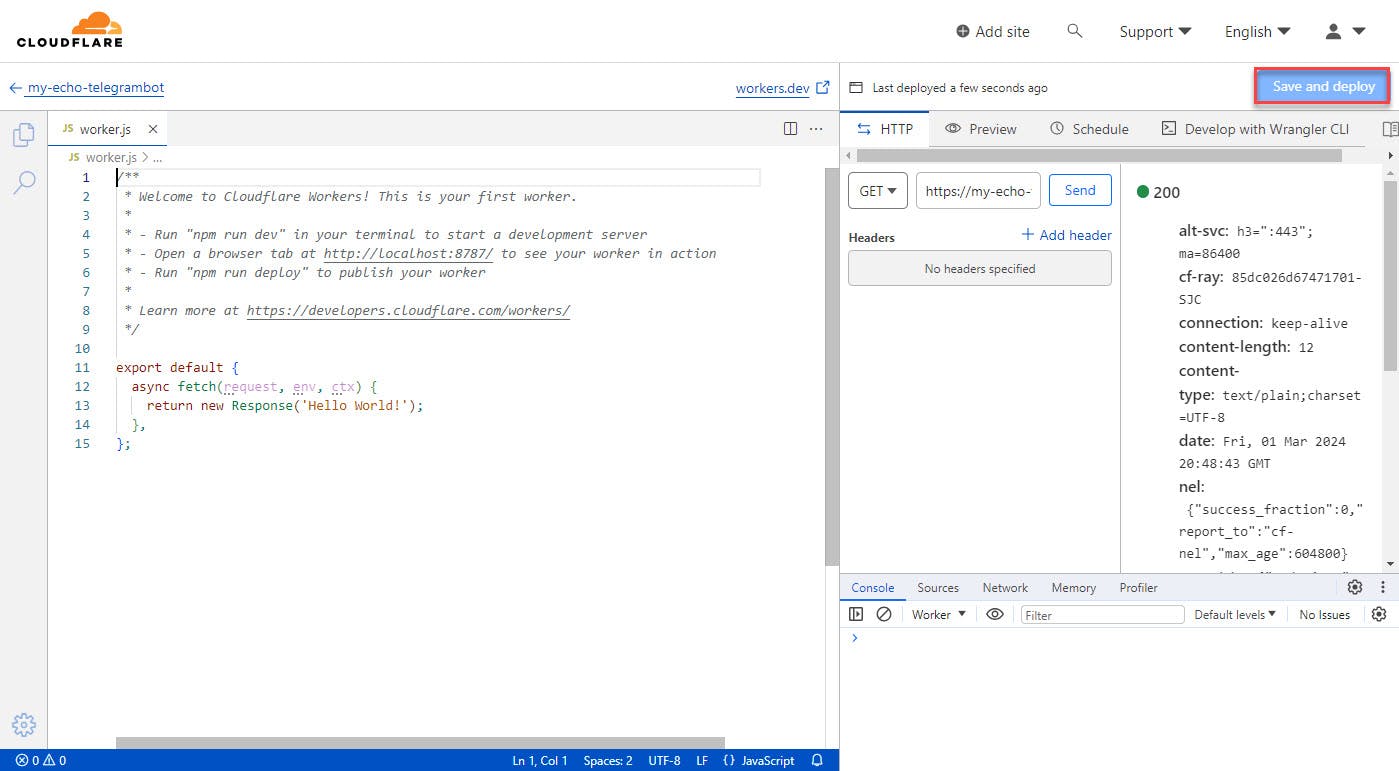
Next, we are going to edit the code of our worker, we can test in the sandbox provided by Cloudflare and when ready we will want to "Save and deploy" our worker once we know it works well.
Finally, we are going to replace the sample code generated by Cloudflare with the following code.
export default {
  async fetch(request, env, ctx) {
    console.log (request.method);
    console.log(env);
    const payload = await request.json();
    if ('message' in payload) {
      const chatId = payload.message.chat.id
      const text = payload.message.text + " over"
      const url = `https://api.telegram.org/bot${env.API_KEY}/sendMessage?chat_id=${chatId}&text=${text}`;
      console.log(url);
      const data = await fetch(url).then(resp => resp.json())
    }
    console.log(payload);
    return new Response('Hello World!');
  },
};
We can test our code in the sandbox by using the POST request with the following JSON as the body.
{
  "update_id": 1140,
  "message": {
    "message_id": 73,
    "from": {
      "id": "id of user",
      "is_bot": false,
      "first_name": "name of user",
      "username": "username of user",
      "language_code": "en"
    },
    "chat": {
      "id": "id of chat",
      "first_name": "name of user",
      "username": "username of user",
      "type": "private"
    },
    "date": 1662102031,
    "text": "hi"
  }
}
This will give you a response 200 of successfully execution, and a few lines of logs in the console as shown below.

Now, we are going to be setting up the web hook for our Telegram Bot using the following URL:
https://api.telegram.org/bot<replace with bot api token>/setWebhook?url=<replace with our worker url>
When running the URL with the changes it should give us the following message.

Testing
Last, we are going to be testing our bot by sending a message to our bot and it will use the worker and reply back. We are going to go back to Telegram and search for our bot and try to chat with it.

Now that we have found our bot, we will start chatting and see what it does!

Here you have it, the echo telegram bot repeats what we send it and a concatenates the string " over" at the end of it.
Conclusion
This quick guide will help you get setup with a Telegram bot in 15 minutes or less, do let me know what you created with it in the comments section. Also, Cloudflare is very inexpensive and has AI enabled APIs and services that you can leverage in your creation.
TIP: Cloudflare workers do not have startup time, unlike Azure App Services and Render (on their free tiers). What does this mean? Well, you do not have to wait when you use your bot and the response is immediate! (there is a bout 3 mins wait time for Azure, and 2 mins for Render).
References
https://dev.to/kevinc/create-and-deploy-your-telegram-bot-here-entirely-free-4cgc