


On the previous article we created a local Tornado we application, in this article we will go over how to setup Azure properly for deployment of your application to the cloud.
First you will need an Azure account, if you don’t have one go ahead and create a free account first. Then we will proceed to configure the service via the Azure portal. We will not be discussing the Azure Cloud Shell as it is not always an option to have admin rights to install it.
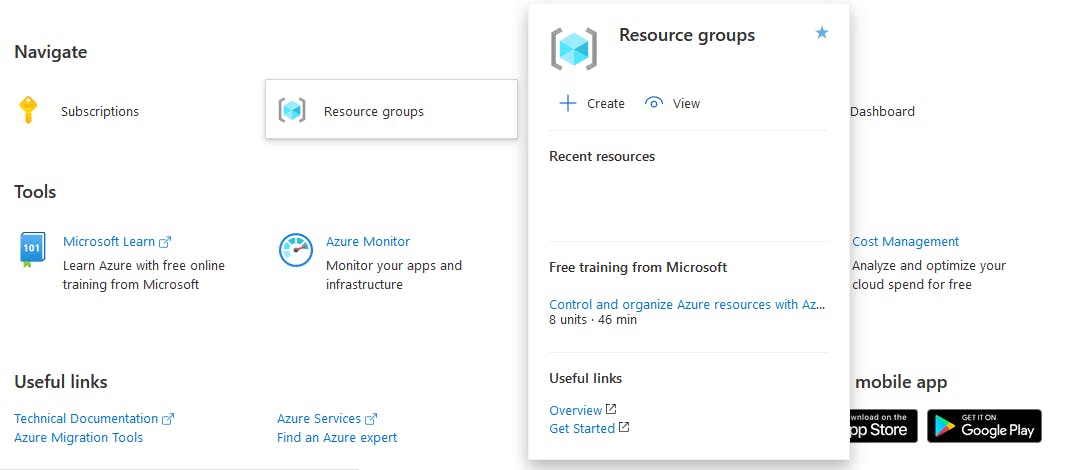
##Create Resource Group##
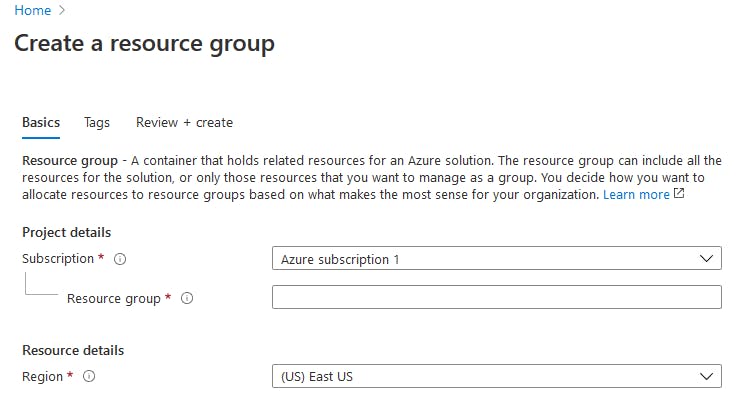
First we will use the option to create a resource group as shown in the image below. We associate all of our tiers within one in order to deploy and manage.
Then we will create the resource group, by selecting the subscription, assigning a name to the resource group, and finally selecting a region. Make sure that your resource group and everything associated with it is located in the same region in order to improve performance.
##Create Web Application##
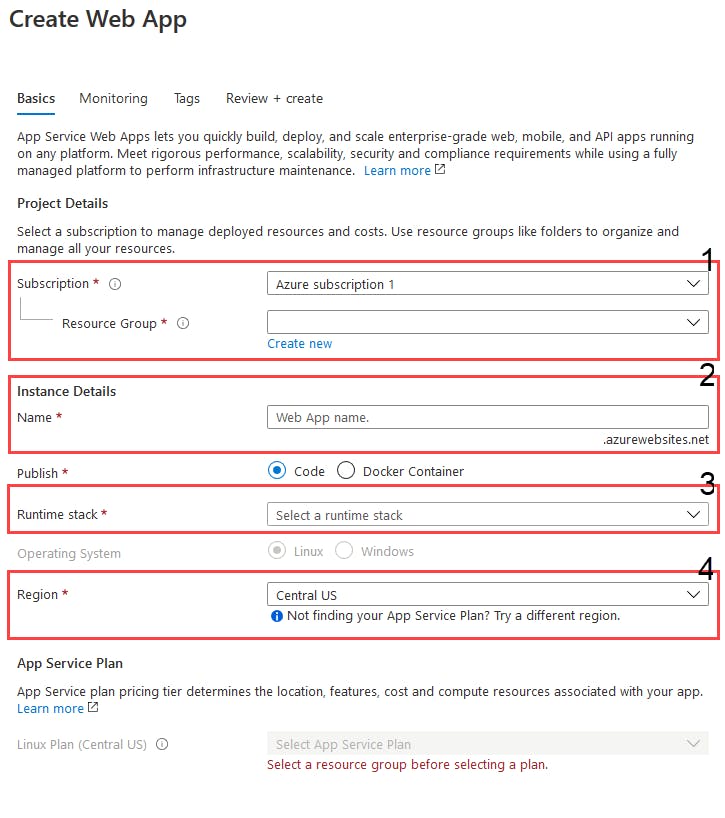
Once you have a resource group, you can go ahead and create your web application.

Once you are in the create web app interface on the Azure portal you have to make sure to do the following:
- This will associate your web application with a subscription and resource group
- The name of your web application, which will be used as part of the address,
http://<Web App name>.azurewebsites.net - The run time stack that we will be using is Python 3+, we are targeting 3.8/3.9 (but you can use an earlier version of Python 3).
- Finally the region, it should be the same as your resource and anything else you want in your resource group (such as a database and such). Also keep in mind the region that you choose affects pricing, and those vary depending on resource type and region! (it is a nice got chat moment) P.S. Azure uses gunicorn on its App Services, because of that we need to use a version of Tornado that is less than 6.0. As an alternative to this issue in Azure, creating an Ubuntu VM would skip the gunicorn issue.
###Test###
At this point we need to test to make sure the web application we created is working. To do so, go to the following url on your browser (replace the with your web application name: https://<Web App Name>.azurewebsites.net
Another mention on this is, we always test, as a rule get used to testing after adding a feature or making changes test, if it does not work, fix it, test again, then moved to the next feature.
##Configure For Tornado##
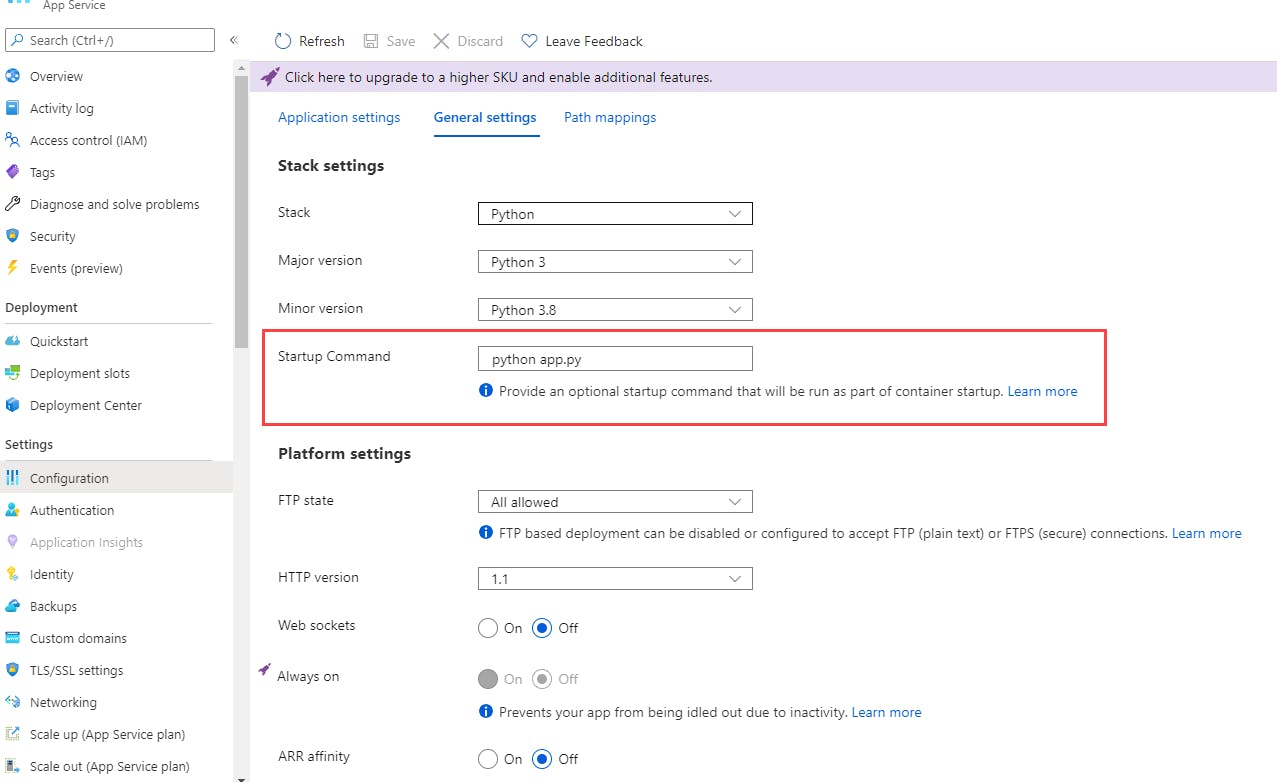
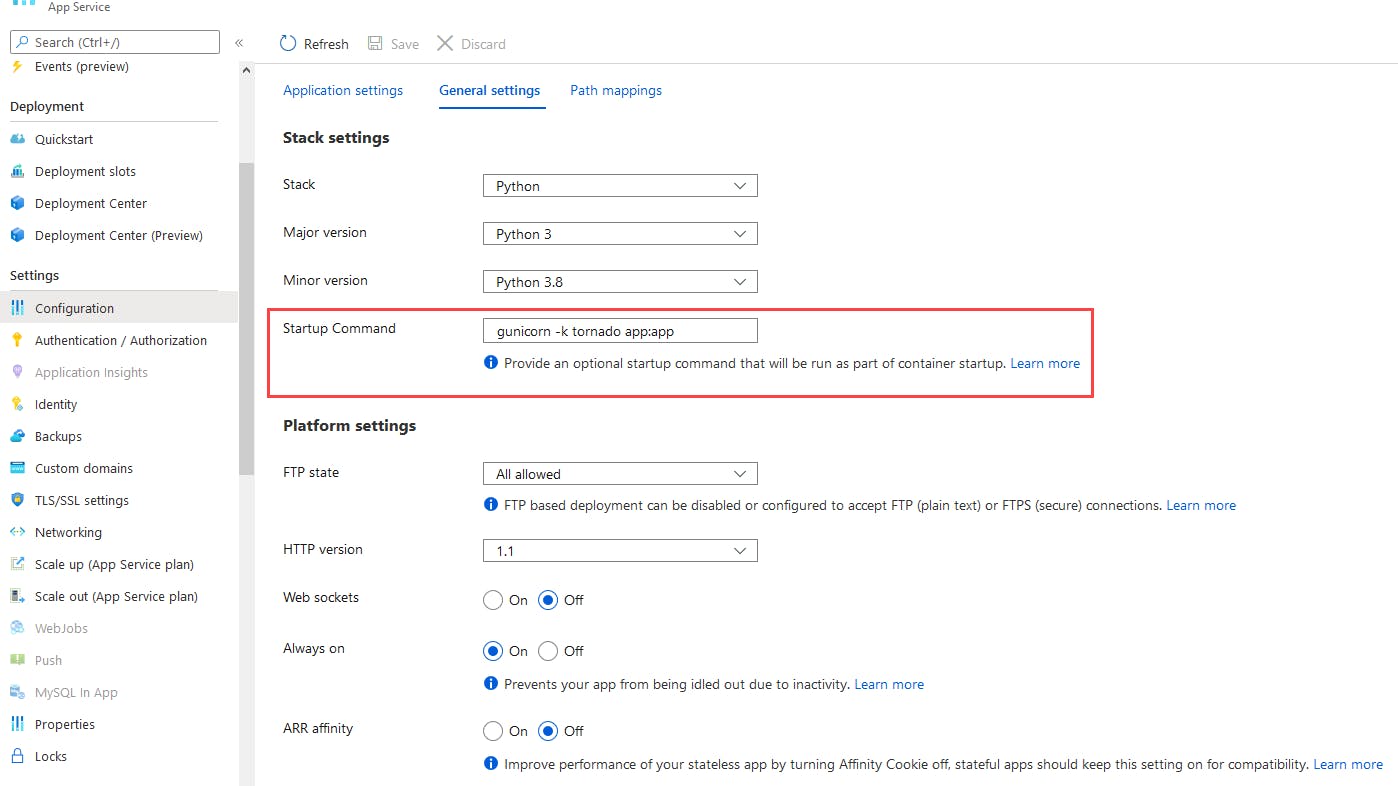
The last step was to make sure tornado is setup to work with gunicorn for the WSGI environment in the Azure App Service by using the command gunicorn -k tornado app:app. However, you DO NOT need to do this anymore as you can just use the python app.py startup command instead to launch your Tornado server on startup. To do this go to the Settings > configuration panel on your App Service and change the Startup Command as shown below:
Previously a gunicorn comman had to be used as shown below:
At this point you have successfully created a working App Service in Azure enabled to launch a tornado application and setup properly. On the next part we will deploy our application.