In this last part of the series, we will take our local Tornado application created in part 1, and deploy to our existing to our Azure App Service project created in part 2.
Deployment is fairly straight forward, especially since you should by know now about git and how to use it. This will not go over git, but will set you in the right track to deploy.
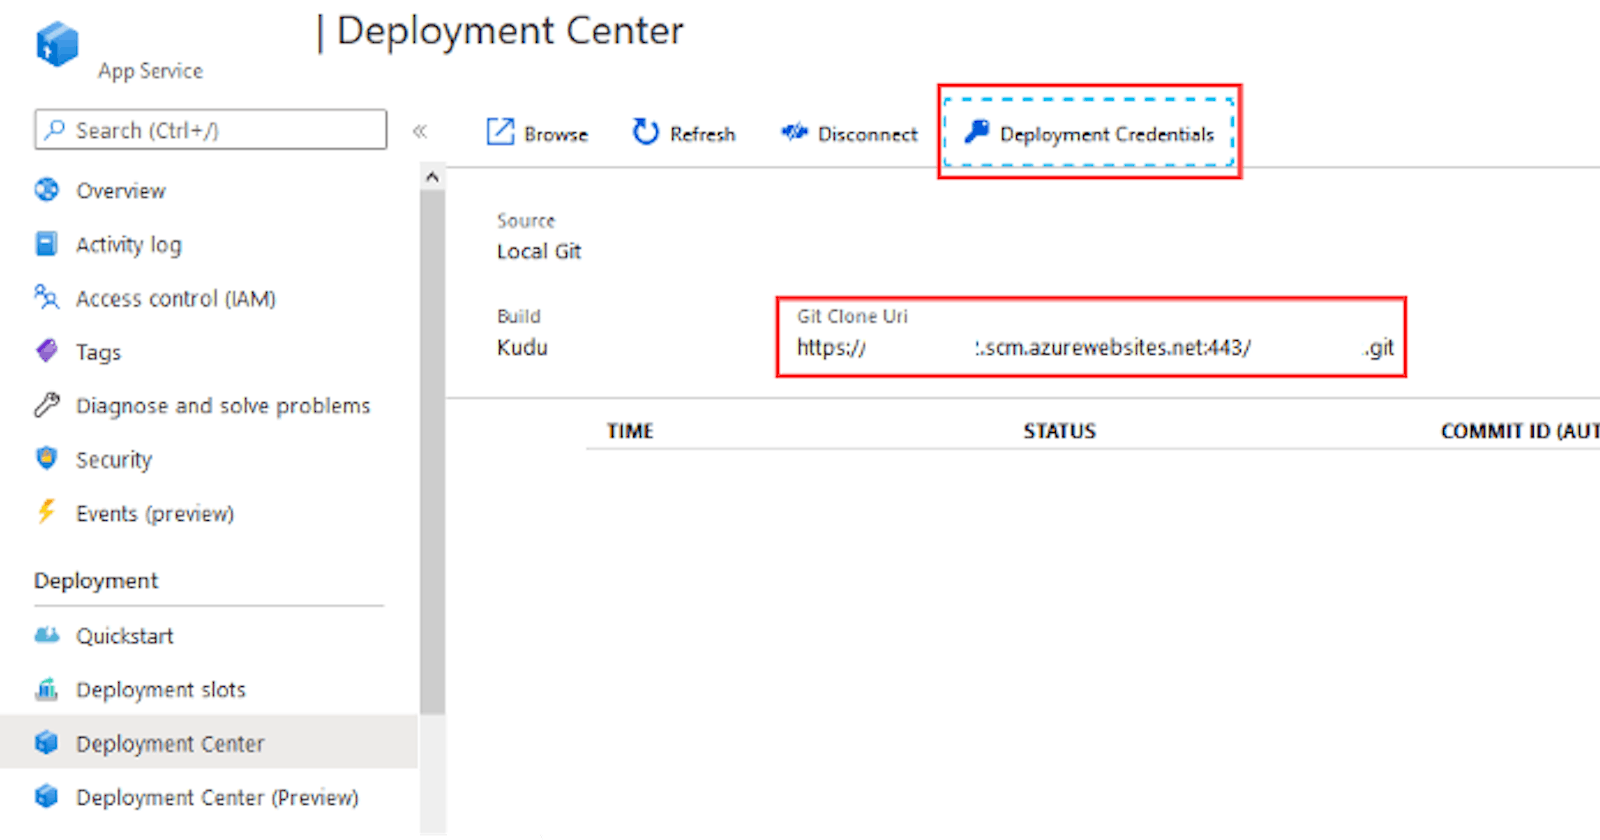
First go to your new project from the dash board once it has been created, then select the Deployment center from the left navigation.

Once you are there, you have a the git link, however you need to click on the Deployment Credentials right most button on the tool bar and will slide in a window from the right.

The window will contain the git account, username, and password. The best option is to use the information from the credentials window and follow these steps, but the punch line is in the image below:

At this point you should have your tornado application running live on Azure without any issues. The main key points here is to have your startup command point to your tornado application properly. If something was not explained thoroughly or did not work do leave a comment or send me a message. Hope this helped!
